Monday 21 September 2015

Save money tying your own micro Jigging assist hooks


Unlike normal lures that uses treble hooks, jigs uses hooks known as assist hooks. These are basically hooks that are tied to a line normally made of Kevlar. Assist hooks being sold in the market today can get pretty costly so here is a fishing hack that your wallet will love you for.

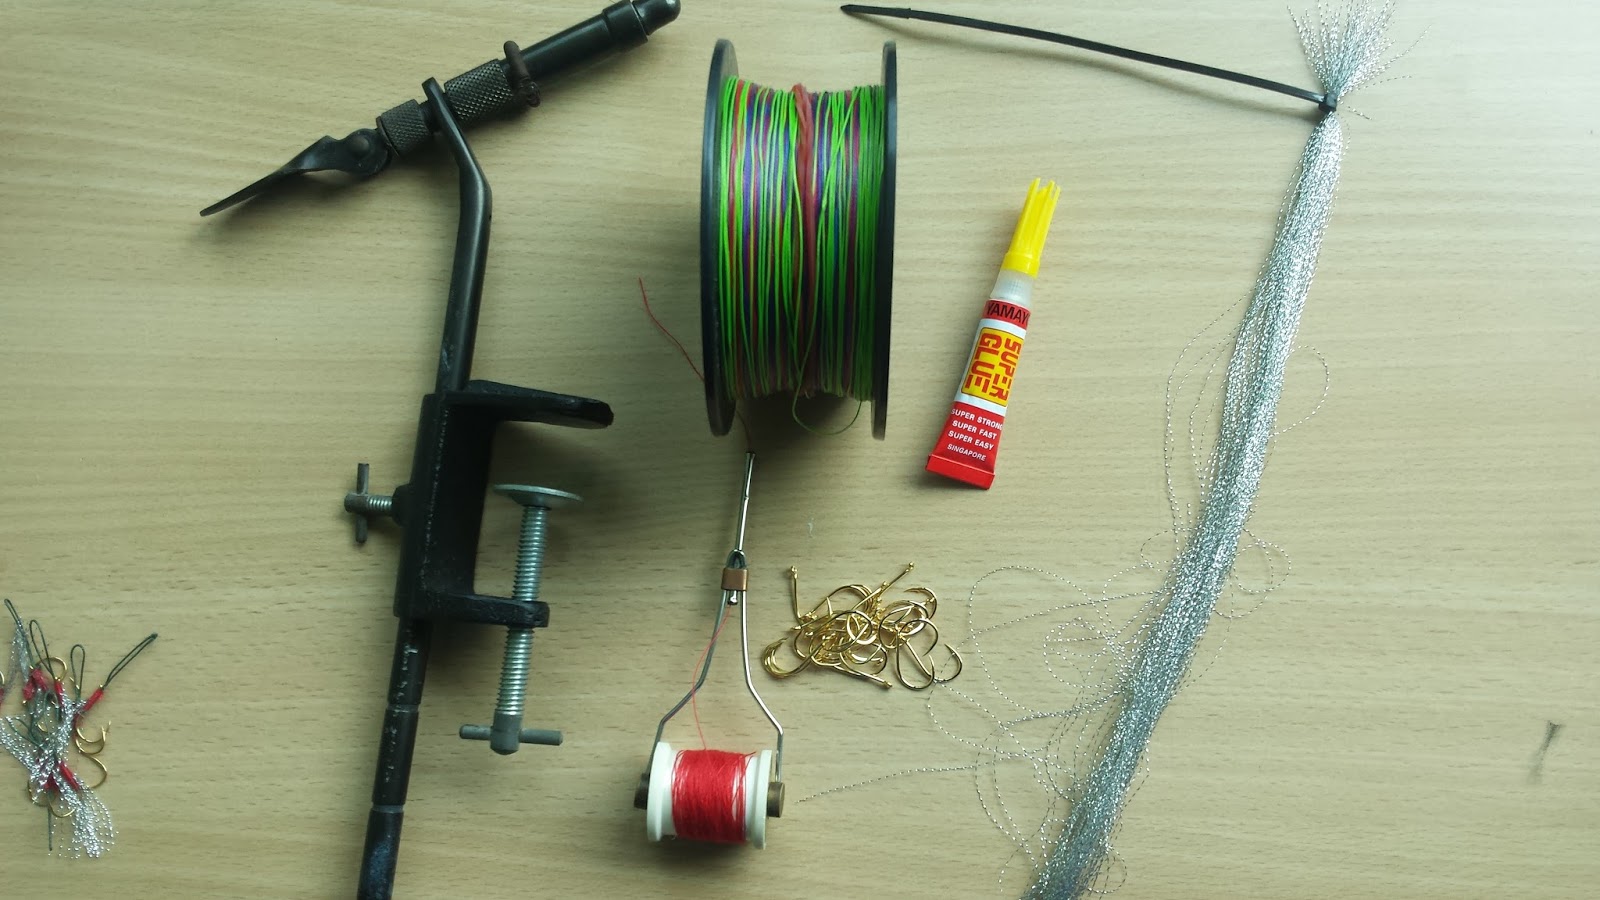
Things you will need. 
1) Fly tying vice 
2) bobbin 
3) Hooks 
4) Assist line 
5) Thread 
6) Flash threads
7) Super Glue 


How to tie micro jigging assist hooks 

Secure hook to the vice 

Start warps from the middle of the shank 

Wrap up towards the eye 

Thread assist line through the eye and back down 

Bring thread to the 2/3 of the shank and add flash thread tie down towards the eye of the hook and half hitch finish it


Link for half hitch 


Cut flash to desired length

Lastly add a drop of super glue and you are done! 


Friday 18 September 2015

Tips For Micro Jigging Setup - MICRO JIGGING Set ups

Lets take a look at the tackle commonly used in Micro jigging.

Micro Jigging Set up - Reel 

Reel :Shimano Stradic 1000
Spinning reels or fixed spooled reels are the best choice for micro jigging. A small spinning reel that can hold Aprox 150 yard of PE 0.4-1.0 line would do, however being light weight would be an advantage to your overall set up. A light set up would be more sensitive, easier to work, reduce fatigue in the long run. Shimano Reels of size 1000 or 2000 would fit this application.

Why Use a Spinning Reel 
  • You would be able easily notice when the jig as touched the bottom. As jigs used can be as small as 3 grams you do not want any resistance when letting your jig down. Spinning reel has no resistance once the bail arm is open as compared to an overhead reel. The main reason for getting snagged on the bottom is due to the inability to tell when the jig has touch the bottom. Letting a jig sit on the bottom is a sure way to get snagged.  
  •  Spinning set ups do not get line wraps on guides as guides are pointing down. An over head set up have this problem unless the rod has spiral guides. 
  • I personally am more comfortable jigging with a spinning set up as it feels more natural 
When fishing light lures, a spinning set up will have a slight advantage compared to the over head set up in terms of casting, and sensitivity when lowering the jig. 


MICRO JIGGING set up - ROD

Choosing the right Micro Jigging rod is important as this would be what you will be using to work the jig. Below is some things I would look out for in a micro jigging Rod 
  • A short butt to allow easy twitching. A long butt would make it hard to twitch the jig.  
  • Light weight 
  • Thin blank
  • Fast to medium fast action 
  • Rod poundage of about 3-7lb for jig range 5 - 25grams 
Micro jigging like conventional high speed jigging require a rod that has a quick action to impart action to the jig. A whippy rod wont absorb the action you meant for the jig. 

A light weight rod would make a great combination with a light weight reel to give you a very light setup. A light weight rod will allow you to pick up alot more information about the jig allowing you to work it effectively. Bites and take would be more obvious as compared to using a heavier set up. 

The rod poundage to use would be determined by the weight of the jig you plan to fish that day. In my Earlier Post I talked about choosing the right jig. If you are planning to fish heavier jigs that day you would need to use a heavier poundage rod to be able to handle the loads. 

Rods that I have personally used 
-Major craft MSX 3-7 lb 
-Major craft Volkey 3-7lb (More whippy use for jigs 3-15grams)
-Senses G2 Pe0.2-0.8  

MICRO JIGGING set up - Line 

Braided line or PE line is a must in micro jigging due to its low stretch. Mono lines and fluorocarbon have way too much stretch and are too thick to have a place in such a refined technique.  The line is the only thing that connects jig to angler and eventually fish to angler. It has a huge responsibility from sending back information to the angler to working the jig and eventually bringing up the fish. Thus it is an extremely important to choose your line carefully. 

Pros and cons of Pe line 
+ Low Stretch (More sensitivity) 
+ Thin diameter (less water resistance easier to lower jig in Fast current) 
-Expensive (Bad for the wallet) 
-Low abrasion resistance (Its thin diameter makes it vulnerable to abrasion)  

Diameter of line to use for micro jigging 
 Thin lines are common in this technique. As mentioned in an earlier post, A mistake many beginners
make is to get a thicker line as they are afraid to go too light. But a thinner line makes it easier to micro jig, thats the irony, So for a beginner I always advice them to go thin. Once you have a feel of the technique you can consider increasing line poundage if you are getting busted off too often.   

Diameter to use
*PE is a Japanese way of measuring line diameter. eg. PE 0.4 = 0.100mm
PE 0.4 Is a great diameter to start with. This diameter not have much water resistance and allow you the most contact and feel with your micro jig. With this line you would be able to get a feel of the jig touching the bottom and feel of the technique.Targeting fishes like sagai with such line should not be an issue as they do not dive for structure when hooked up. 

PE 0.6 Has a good balance of water resistance and breaking strength. If the PE0.4 line is being busted off too often you could consider to up the line PE.

As a rule of thumb try to keep PE as low as possible while balancing breaking strength. Two lines can have the same PE/ Diameter but different breaking strength. Before changing changing a PE line class for a stronger line do consider getting a same PE sized line of a higher line test. And whenever possible try using a lower PE line.

Amount of line to spool 
Cause of the thin lines being used backing is normally required. 150 yards of line for micro jigging is normally sufficient for the game we are after. However if you are planning to go after bigger game such as golden trevally/ ebek 300yards is recommended.

MICRO JIGGING set up - Leader 

#3 - #5 florocarbon Leaders are good leader thickness to go with. A #3 leader is about 11 lbs. For Micro jigging I like my leader to be twice the length of my rod. 1 to protect your thin main line and 2 fluorocarbon leaders are less visible under water   Start off with a medium #4 leader as a good balance of thickness and abrasive strength. Use a lighter leader if bites are thin as this will increase your chance of a hook up.

MICRO JIGGING set up - Jig 


There are the 4 main things to consider when choosing/ buying a jig. You could buy all the jigs in the
market but it would be useless if you do not know when to use what. 
  1. Size/Weight  
  2. Shape 
  3. Material  
  4. Color
I've done a full post on jigs and how to choose the right one. Check it out Here: Choosing the Right Jig


Well Thank you for reading! Fell free to comment if you are still unsure.

FISHINGJOJO


Wednesday 16 September 2015

Types of Micro Jigs- Choosing Micro Jigs to get more bites

In this post I would be sharing with you the different types of micro jigs available and types of jigs you should use to get the most of it.

Here are the 4 main things to consider when choosing/ buying a jig. You could buy all the jigs in the market but it would be useless if you do not know when to use what. 
  1. Size/Weight  
  2. Shape 
  3. Material  
  4. Color


Size and weight of the jig
The first thing that comes to mind when you are selecting your jig. This will determine the size profile of you jig and also how fast it takes to reach the bottom. As a rule of thumb I like to start off with the lightest jig I can use and work my way up.  This will give me the smallest profile jig that tend to get more bites. 
How to choose ? 
A heavier jig would reach the bottom faster than a lighter jig and would not be affected by the current as much. If you find that your jig drifting too far by the time it touches the bottom switch to a heavier jig. Do the reverse if your jig is too heavy and you want to let your jig to drift alittle in the current to cover ground


Shape- How to choose the correct shape 

The next step after choosing the size you want to fish with would be the shape. The shape of the jig will determine the jig action when being worked and also if it flutters on the drop. A flatter jig would have more action than one which is cylindrical shaped. Take note that a flatter jig has ore water resistance hence affects how fast i reaches the bottom. A leaf shape jig would take longer than a slim long jig of the same weight to reach the bottom.
How to choose? 
This would vary according to the location. Ask around and find out what works. If you cant get any experiment around till you find what is working. Fluttering jigs has more action and can get fishes to bite when they are not active.

Material of the jig
Not all jigs are made of lead. Another alternative is tungsten which is about 1.7 times denser than lead. What this means is that jigs can be made heavier with a smaller profile. Which is great for micro jigging. This solves the problem when the fishes are only eating tiny jigs but the current is too strong for a tiny lead jig to get to the fishes. A tungsten jig of the same size would weigh heavier and allow you to reach the bottom with out having to change to a bigger profile jig.
How to choose? 
The down side of tungsten jigs is its price. Is it worth the price some may ask? yes if you are making full use of its advantages. If you are caught in a situation where you need a heavier jig to reach the bottom but by doing so the fishes would shy away from the bigger jig, the tungsten jig would shine. Not only will it have the same size or smaller but will get down faster as it is heavier. 

Color-Does Color really matter
Well this is a really up to the angler and down to personal choice. There had been debate over years if fishes can see color. Use what you like. Personally I like using natural colors.
How to choose ? 
If you are unsure of what colors to use ask around what color works. I've personally seen a particular color working well over another but is still up for you to decide. As a rule of thumb bait fishes are normally sliver in color which seems to be a safe bet I go with when I start off for the day.

Tip micro jigging is about being small 
For fishes like sagai. Sometimes a smaller jig is all it takes to get them to bite. The Bait fish they are after are tiny so dont be afraid to go small. 

Thank you for your time and I hope you enjoyed this post as much as I  did! Do comment if you have any question !

FISHINGJOJO

Refining your MICRO JIGGING style- Secrets of JIGGING style

In my earlier blog post I talked about Micro jigging and how to rig your jigs. In this post we would be going even deeper into the topic and I would be sharing with you the different styles of working your micro jig and tips on how to get more bites. This post should give you and idea of how you could work your jig on the next trip. Do not be afraid to experiment to find what works best for the fishes.

Unlike a conventional fishing lure, a jig is designed to be worked vertically. In a conventional lure the angler would cast his lure out and reel it in and the design of the lure makes it swim. For a jig it is slightly different. Action of the jig is imparted alot by the angler just like a jerk bait and for this very reason a jig used by two different people can have very different actions or bite rates. Remember the last time you were using the same jig as Mr lucky but you just did not get any bites ? On top of that, the depth you are fishing is going to affect your bite rate too. Sounds complicated? Not really, Lets look at the different styles of jigging.

Mechanical Jigging Style  
This is probably the most basic of all jigging styles and most styles revolves around this style but with a slight variation.
Start off by dropping your jig down to desired depth and close the bail. Start cranking in line and dropping the rod once at the bottom give the rod a jerk repeat process. The jerk up is what gives the jig a darting action. Watch this video if you dont quite get me -How to jig

Variation 1 one crank one twitch 
In this style you would make a full crank of the reel followed by a flick of the rod. The pause is short in between the flicks and its almost like a continuous process

What can I get on this method ? 
This method has been productive for me on pelagic fishes such as Sagais , trevally ,queen fish and tengiri . These fishes when aggressive cant resist a bite at a quickly retrieved jig. Sometimes a faster retrieve is need to get a bite and this variation is best suited when the bites are hard and fast. This method is not as effective for bottom fishes as the jig gets worked out of the strike zone too fast. It is still possible to use this method but take note to let the jig back down to the bottom after about 10 repetitions.

Variation 2 Crank twitch pause
Guess what ? Most bait fishes are eaten when they stop. The slight pause gives the fishes just enough time to catch up and have a bite at your jig. In this style a pause is added to the previous style mentioned. How long or shot you want the pause to be is up to you but i typically keep mine below 2 seconds.
What can I get with this method? 
This method has been very deadly on pelagics also for the golden trevally which does not respond as keenly to very fast jig. I figured out this method on a trip when one particular guy was hitting fishes regularly but only him. I noticed him for a while and added a pause to my stroke. Guess what the fish hit on the pause.


Variation 3 Twitch twitch twitch crank 
Using jut your wrist give a few short sharp snaps of the rod with each twitch bring the rod higher. This cause the jig to dart erratically. A pause after that is up to you. Crank up the line while dropping the rod if you want to work the next column of water. If not drop back down and repeat.

What can I get on this method ?  
In this method an angler can work the same column of water repeated if he decides not to crank when lowering the rod. This this method can be very deadly on bottom fishes such as groupers and snappers. The jig can be kept very close to the strike zone and is constantly moving to attract the attention of the predators.

TIP 1 Dont be taken by surprise on the drop 
There is two ways the impart action to a jig. Jerking it up the water column and two on the drop. Many anglers under estimate how a falling jig can be deadly and miss a hook set when taking by surprise on the drop. Just like how a fish would hit on the pause micro jigging is fun cause you never know when the hit would come

Tip 2 fish in the strike zone and you will be rewarded 
There is no point fishing a jig from the bottom all the way up if they are holding 10 meters above the sea floor. Jig it up past the fish and let the jig back down. That way you are fishing twice as much as the guy beside who is working his jig all the way up. If its bottom fishes you are after even more so important to keep it close to the bottom!

Tip 3 Look around and observe 
Just like how I came to know the third method. Keep your eye out for that one person who keeps getting fish. His jig size and color, his line thickness. If its all similar you should be getting fish too if not observe where he is casting to and his style of jigging you should catch on pretty fast!

Conclusions 
In short there are three parts to the technique that can be changed

  1. The Lift/Twitch 
  2. The Cranking 
  3. the Pause 


To this three parts you can change the speed and timing and action. That gives you alot of flexibility to come up with a jigging style that catches fish ember the 3 tips and you would be good to go. The three styles I mentioned in this post are just variations that have worked for me and are by no means a style you should stick to but they can give you a base line to start out with. 
I hope you enjoyed this blog post and I might post videos on the basic jigging styles in future. For any questions feel free to comment!

FISHINGJOJO

Tuesday 15 September 2015

How to Rig your Micro Jig- Micro jigging Rigging

In the Micro Jigging Page  I covered the basics of micro jigging. In this series We will cover the ways to rig up the micro jig. Rigging up your jig would make the difference in hook up and bite rates. A jig action is designed to work best with nothing on it at all hence when rigging we want to pay attention to what we are adding onto the jig the lesser the better the jig action also better hook up rates.

Micro Jigging Rigging

-Easy switch method 
-Improved EZ switch method 
-Minimalist method 
-Kiasu method 


1) The Easy switch method 
How to rig Micro jig


This method requires three things a barrel,split ring, solid ring 
Leader is tied to the barrel swivel

Advantages
-The barrel swivel prevents line twists 
-Jig can be easily switched out via split ring 
-Hooks can be easily switched out to bigger or smaller hooks via split rings

Disadvantages 
- It is a bulky and can affect the action of the jigs. Keep in mind we are using tiny jigs as tiny as 5grams. 
-When a fish is hooked up the solid ring is the weakest point which is a possible point of failure. Beefing up the solid ring could mean affecting the action even more. 

When to use this method? 
This method of rigging is best used only when fishes are Fussy and you have to constantly keep changing jigs and jig sizes. The main advantage is that you dont have to keep retying your leader to the jig and that can cost you fishes . However the two disadvantages is why I would shy away from this style.

2)The improved EZ switch method  
How to rig Micro jig


This method requires two things a split ring, solid ring 
Leader is tied directly to the solid ring

Advantages
-Jig can be easily switched out via split ring 
-Lighter than method 1(jig is more lively) 
-Split ring is no longer a weak point 

How to rig Micro jig Disadvantages 
-Lack of barrel swivel can introduce line twist  
-Hooks cannot be easily switched out
-Hinders jig action slightly 

When to use this method? 
This method of rigging is best used when jigs used are about the same size but fishes are Fussy on color and you have to constantly keep changing jigs. The main advantage is that you can change jigs quickly but changing hook size would require retying . This is a method which I would recommend over the conventional method 1.


3) Minimalist method 

This method require no add ons and leader is tied directly to the jig 

Advantages
-Brings out the best action in the jig
-Has no weak points 

Disadvantages 
-Lack of barrel swivel can introduce line twist  
-Hooks cannot be easily switch out 
-Jig cannot be easily switched out 

When to use this method? 
This method of rigging is best used when you are sure of what size of jig and hooks fishes are biting that day. This would bring out the best action and also give no good confidence as there is no weak points. However an angler proficient in knot tying should not find the disadvantages a hindrance and enjoy the advantages of this method with out much downside. This is the method I use on a regular basis as it brings out the best action from the jig. 

4) Kiasu method 

An additional treble hook is added to the jig this method is to be used with any of the earlier 3 mentioned method.
Advantage 
-Improves hook up rate 

Disadvantage 
-Severely affects jigs action 
-Increases risk of jig getting stuck 

When to use this method? 
This method should only be use if you are facing huge difficulty in converting bites into hook ups. The disadvantage of having the treble on is way more than the advantage it brings. Paired with method one of rigging can kill the action of the jig entirely. So only add on the treble if there is a real need. 


Looping in of the hooks
This is how you sure the hooks to the jig or the solid ring.
  1. Thread line through the jig 
  2. Bring hook back into its loop
  3. Pull hook end 
  4. Tighten  
How to loop in hook


Micro jigging Tips For rigging 


  • Keep the rigging to the minimal an thing that adds weight affects action 
  • Adding 2 hooks instead of 1 increases your hook up rate

Thank you for taking time to read this and I hope you found this useful. Feel free to comment or drop me an email if you have any questions.

FISHINGJOJO